Remove and Go

Terracotta Tiled Floor Renovation Hawkshead

Terracotta Tiled Flooring Stripped and Sealed in Hawkshead

The client from Hawkshead had used Tile Doctor previously to renovate a Terracotta tiled floor. Now eleven years later the floor needed attention again and so I went over to the property to survey the tiles and get a good understanding of any issues and requirements.

I went out to the client to assess the floor and could see the sealer had all but gone and dirt was becoming ingrained in the Terracotta. It turns out the client had been using flash floor cleaner which has a PH over 12 making it a strong alkaline and similar in PH to our own product Remove and Go which we use for stripping sealers off floors.

Terracotta Floor Before Cleaning Hawkshead

After discussing the floor in detailed I proposed stripping the floor back completely to its pre-seal state, deep cleaning to flush out the ingrained dirt then and re-sealing to bring the tiles back to their best condition. I worked out a detailed quote which was accepted and a date set for the work to start two weeks later.

Cleaning a Terracotta Tiled Hallway Floor

Before stripping and cleaning time was spent adding protection to the kitchen island, skirtings, and exposed surfaces. This is necessary to prevent moisture and chemical exposure soaking into the woodwork which can result in warping and staining.

Next a strong dilution of Tile Doctor Pro-Clean was sprayed across the entire floor and after leaving it to soak in for ten minutes scrubbed into the tile and especially the grout. This product is an effective Tile and Grout cleaner and served as an initial clean to the grout and Terracotta which is very porous.

Terracotta Floor During Cleaning Hawkshead Terracotta Floor During Cleaning Hawkshead

The floor was inspected and there was still evidence of sealer in the less used areas of the floor as well as deeply ingrained grime. To deal with these problems Tile Doctor Remove and Go was sprayed onto the problem areas and left to soak in as before. After ten minutes the solution was agitated using a deck brush and then worked into the Terracotta using a rotary scrubber fitted with a black pad. Each part of the floor was scrubbed five to six times to remove any remaining sealer and release the dirt. Afterwards the floor was rinsed with water and the soiling extracted with a wet vacuum and at this point you could really see the true colours of the Terracotta.

Next step was to give the tiles and acid wash using Tile Doctor Acid Gel which applied to the tiles and diluted with water whilst being brushed into the tiles. This removes residues, mineral deposits, old grout smears and remaining contaminants. Being acidic it neutralises the floor after the alkaline cleaning products used earlier. After being allowed to dwell briefly it was then removed using the wet vacuum. The floor was then rinsed with water and extracted again to remove any trace of product prior to the next step of sealing.

Sealing a Terracotta Tiled Hallway Floor

I left the floor to dry out overnight with multiple floor fans to accelerate drying and returned the next day to seal the floor with Tile Doctor Colour Grow. This product is an impregnator that soaks into the pores of the Terracotta and acts as a barrier to prevent dirt from becoming ingrained there. It also contains a colour enhancer that really works well on Terracotta to bring out the natural red and orange colours in the tile.

Once that Colour Grow had dried which leaves a matt finish, I completed the sealing by topping it off with five coats of Tile Doctor Seal and Go which adds a nice subtle shine to the tile. When complete the floor looked so much better with improved colour and depth and a lovely silky appearance.

Terracotta Floor After Cleaning Sealing Hawkshead Terracotta Floor After Cleaning Sealing Hawkshead

The outcome was very satisfactory and the client was extremely pleased with the result and the floor was ready in time for Christmas guests. For aftercare I recommended Tile Doctor Neutral Tile Cleaner which is a mild yet effective cleaning product that won’t affect the sealer.


Professional Renovation of a Terracotta Tiled Flooring in South Cumbria

Terracotta Tiled Flooring Stripped and Sealed in Hawkshead Read More »

Victorian Tiled Floor Renovation Cartmel

Late Victorian Tiled Hallway Floor Impacted by Subsidence Renovated in Cartmel

Pictures below are from a Victorian tiled floor we recently renovated in the South Cumbrian village of Cartmel. The house had experienced a bit of subsidence in the past, which had settled long ago, but left a series of cracks running through from the front door to the staircase.

Victorian Floor Before Renovation Cartmel Cumbria Victorian Floor Before Renovation Cartmel Cumbria

The owner of the property had decided to get the floor renovated and wondered if anything could be done to improve the cracks and reset several tiles which had become loose. Having restored numerous period floors previously I was confident all these problems could be resolved and the floor renovated to a high standard.

Victorian Floor Before Renovation Cartmel Cumbria

Repairing and Cleaning a Victorian Tiled Floor

Before cleaning the floor needed to be secure so the subsidence issues had to be resolved first. I had to take out several loose tiles, rake out the old adhesive and grout and then reset them with fresh rapid setting adhesive and grout. Then to resolve the cracking a colour matching grout filler was pushed into the gaps and this disguised the cracks quite well.

Victorian Floor During Renovation Cartmel Cumbria

Once the repairs had set the cleaning process could begin starting with the application Tile Doctor Remove and Go worked in with a coarse 200-grit milling pad. Remove and Go is a powerful tile cleaning product that as the name suggests will remove all sorts of coatings such as sealers.

Small hand-held Diamond blocks were used for cleaning up the Yellow tiles, these tiles contain sand in the clay to give it the colour as such they are always the most porous and most difficult to get clean. However we have found using a set of handheld Diamond blocks of different grits we can open up the pores of the clay, release the ingrained dirt and then close the pores ready for the final clean and seal.

The final clean involves giving the floor an acid rinse for which I use Tile Doctor Grout Clean Up. This final step removes old grout smears, clay resin and also counters the use of alkaline cleaning products such as Remove and Go leaving the floor with a neutral ph. Lastly it etches the clay slightly resulting in a stronger bond with the sealer, improved finish, and better performance.

Sealing a Victorian Tiled Floor

To seal the floor a thin coat of X-Tra Seal was applied, this is an Oil based Impregnating sealer that soaks into the pores of the clay tile protecting it from within and helping the colours to pop out. Additional this sealer is fully breathable which is an important consideration when dealing with a floor laid in the Victorian era without the benefit of a damp proof membrane.

Victorian Floor After Renovation Cartmel Cumbria

As usual before leaving we like to advise the customer on how to maintain the tiles using a compatible cleaning product such as Tile Doctor Neutral Cleaner. This aftercare product has a neutral ph. which won’t impact the sealer like many of the standard bleach based products you find in supermarkets.

Victorian Floor After Renovation Cartmel Cumbria


Professional Tile Repairing, Cleaning and Sealing for a Victorian Tiled Floor in Cartmel

Late Victorian Tiled Hallway Floor Impacted by Subsidence Renovated in Cartmel Read More »

Old Black Slate Floor Restored Grange-over-Sands

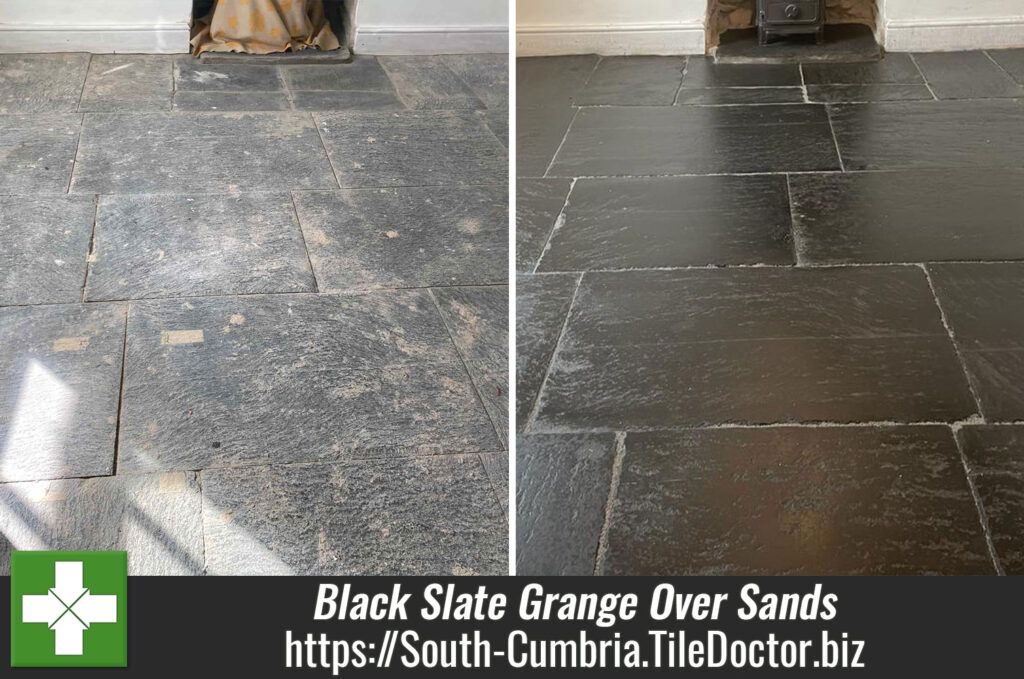
200-Year-Old Black Slate Floor Restoration in Grange over Sands

The customer from Grange Over Sands had taken up a musty smelling carpet that had been in place for many years over a Black Slate tiled floor. After taking to the internet to do some research he had worked out that the pointing would need to be re-done, the stone deep cleaned and then a breathable sealer put in place. Using a breathable sealer on an old floor is very important as it won’t have a damp proof membrane and so must be allowed to breathe. If the moisture can’t rise through the floor, it will accumulate and reach out to the walls causing rinsing damp which can be most unpleasant and result in mould.

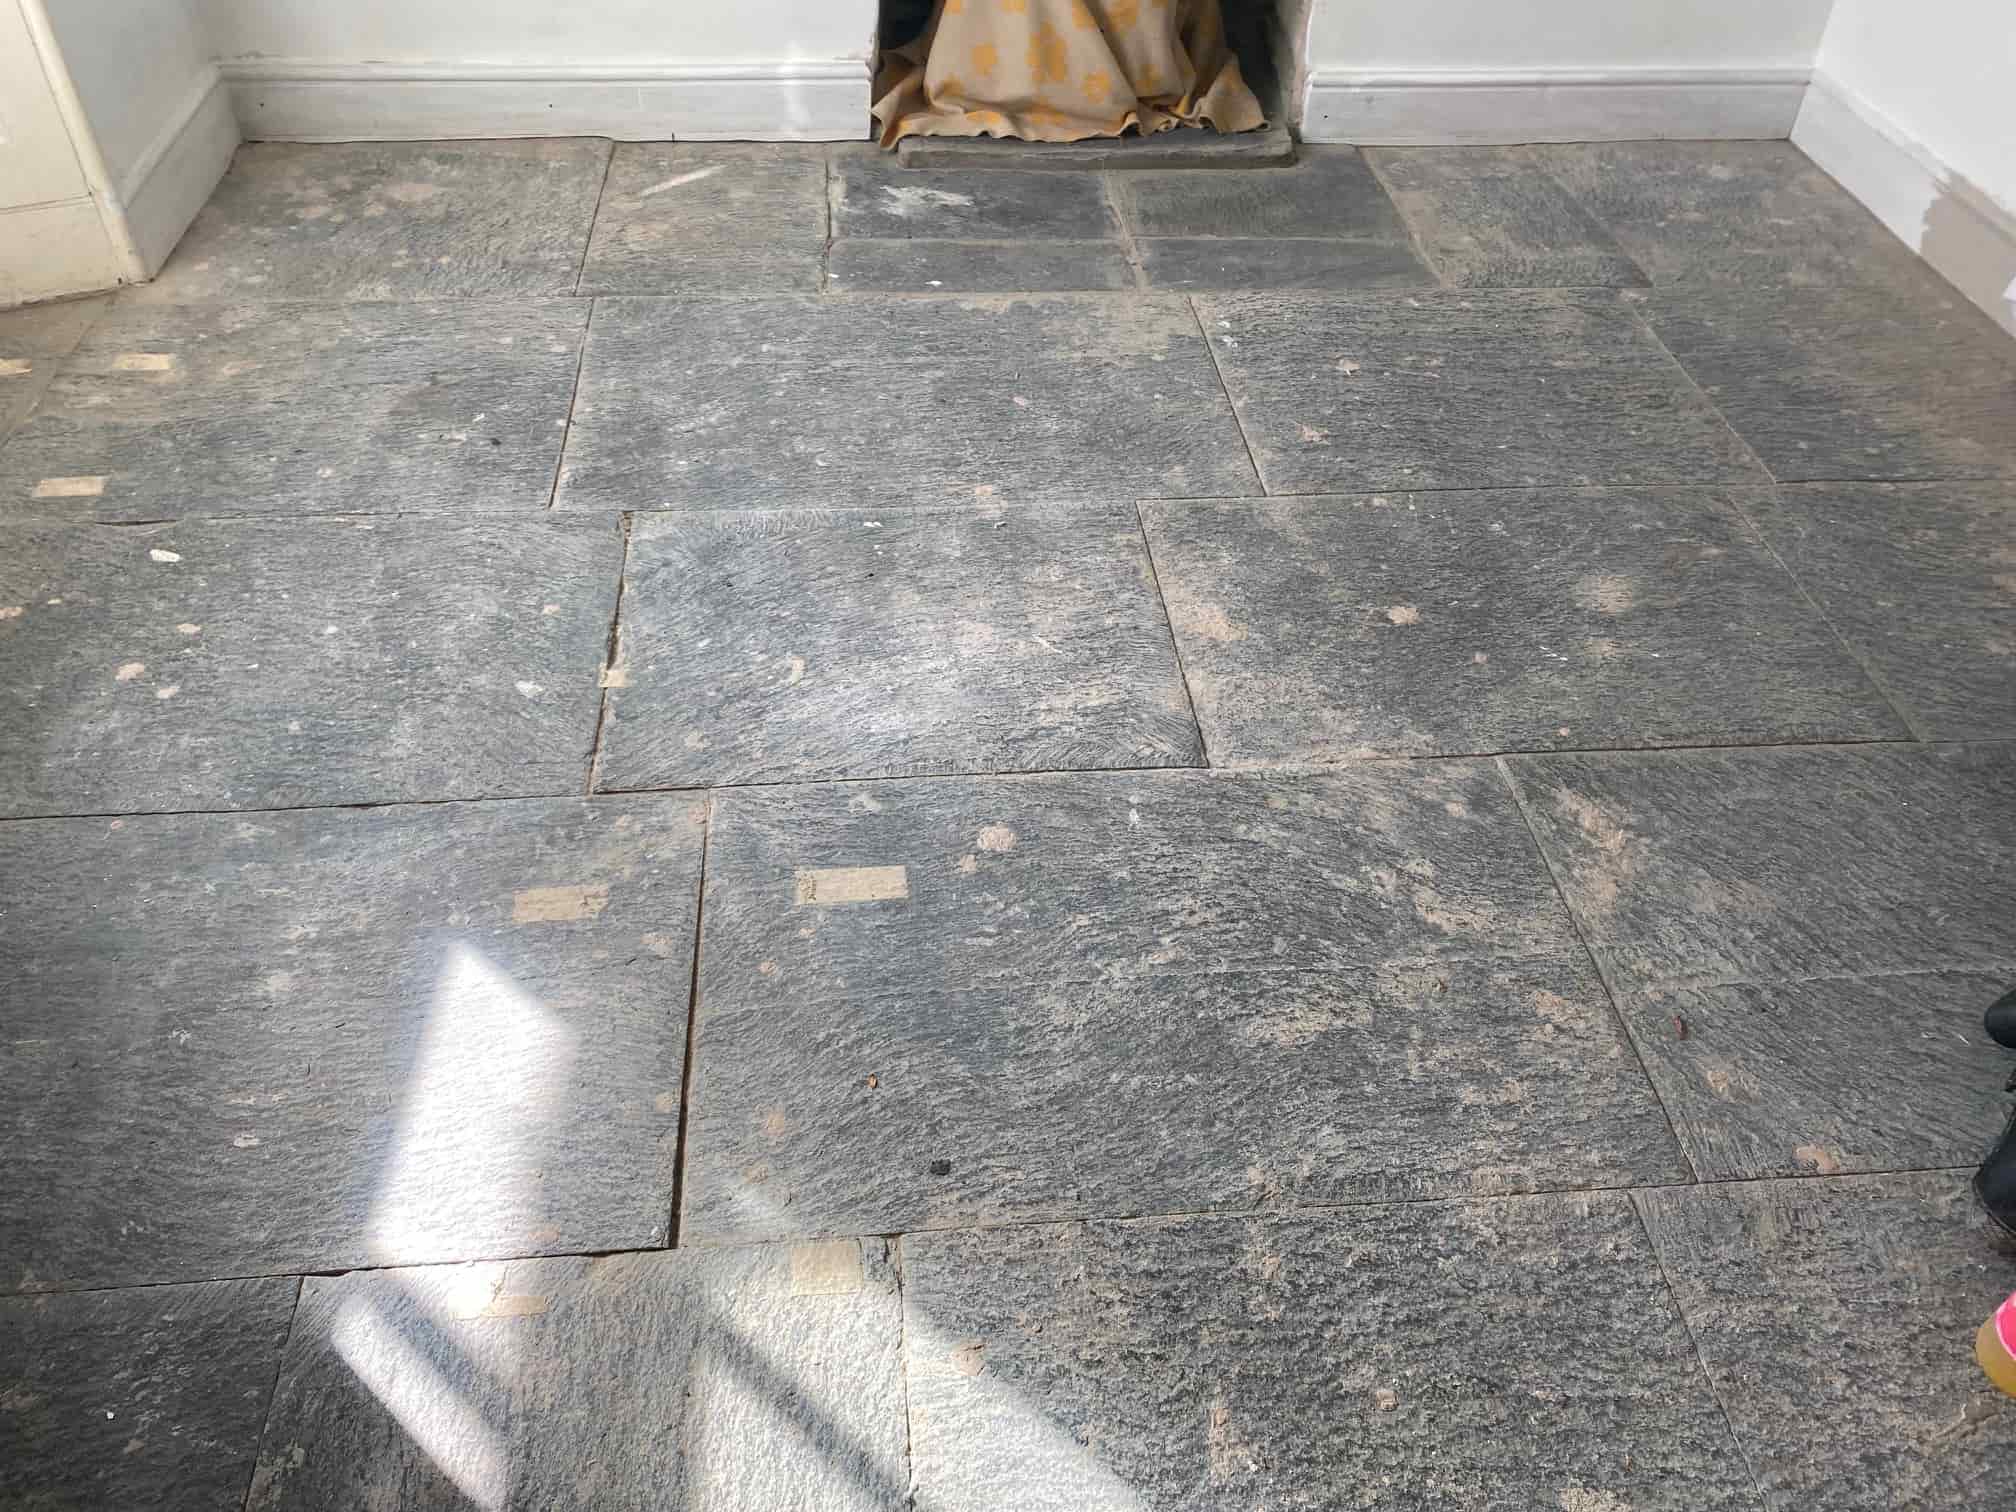
Black Slate Floor Before Cleaning Grange-Over-Sands

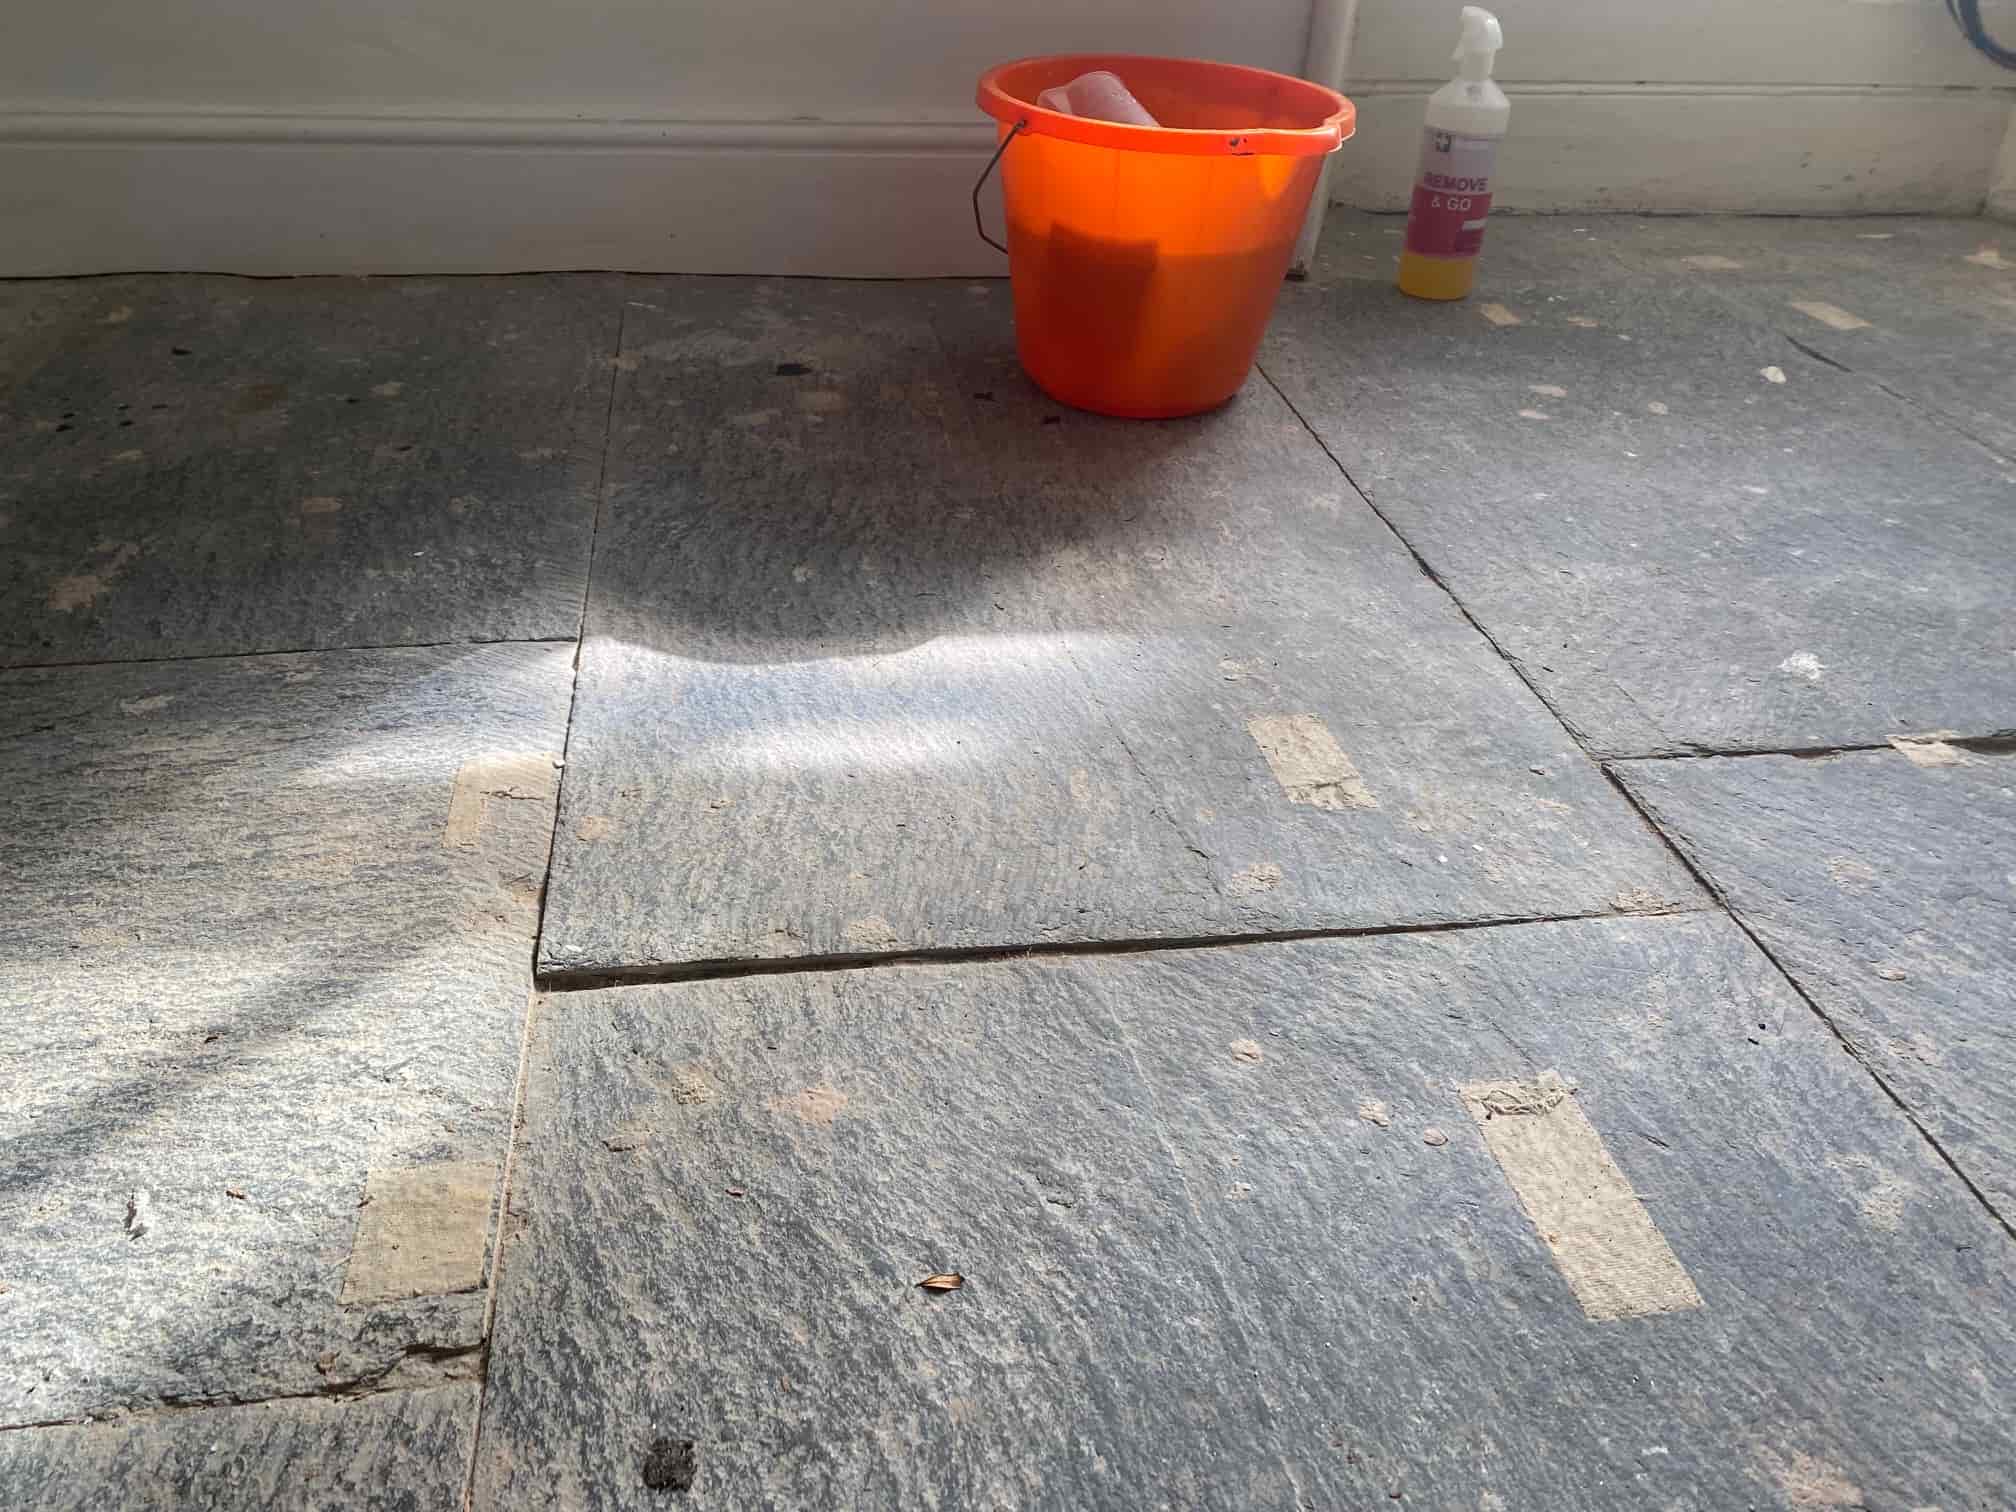
Realising this was a lot of work to do on his own we were asked to quote for renovating the whole floor including sealing. Whilst I was there surveying the floor, I also noticed the slate slabs were slightly uneven with small height differences between the stone tiles, something we call lippage which can be a trip hazard.

Black Slate Floor Before Cleaning Grange-Over-Sands

Speaking with the owner I discussed the lippage problem and how it could be resolved using a process Tile Doctor invented called milling which uses very coarse diamond encrusted pads to grind away up to 4mm of unwanted stone and then refinish the surface. Happy to go with my suggestion out quote was accepted and a date arranged for the work to begin.

Milling Black Slate Flooring Level

We use a heavy weighted buffing machine to mill the stone, it weighs about 55kg when fully loaded and the extra weight ensures the coarse diamond pads make good contact. The process starts with a 50-grit DRB Milling pad to cut into the stone and remove the lippage, only water is used to help lubricate the process and once done the floor is rinsed and the soiling removed with a wet vacuum.

This process is followed with a 100-grit DRB pad and then a 200-grit DRB which hones the stone and gives it a smooth texture. The other advantage of using these pads is by removing the top layer it also takes the dirt with it leaving a new clean surface.

Next step was to knock out the old pointing with a Titan Breaker tool, it’s a noisy process but much of was already loose or missing so it was easier than it sounds. The old pointing was replaced using a modern flexible product that is also breathable.

The new pointing was allowed to cure overnight and then we called back to finish that stage of the restoration by working in a dilution of Tile Doctor Remove and Go with a 200-grit milling pad. This step is designed to remove any sticky texture left over for the pointing and then we give the floor a final rinse with water and vacuum off the excess.

Sealing Black Slate Tiled Floor

The floor was left to dry off overnight and we came back for a 3rd day to seal the slate which was the final stage in the restoration. Before doing so though we like to check the moisture levels of the stone to make sure its dry enough. We don’t recommend applying a sealer to damp tile as it the results can be patchy.

To seal this floor two coats of Tile Doctor X-Tra Seal were applied, this product is oil based which is perfect for Black Slate as it helps restore the colour and adds texture to the stone. X-Tra Seal is also breathable and so will allow moisture from under the floor to rise through the stone and evaporate at the surface so no more musty damp smell.

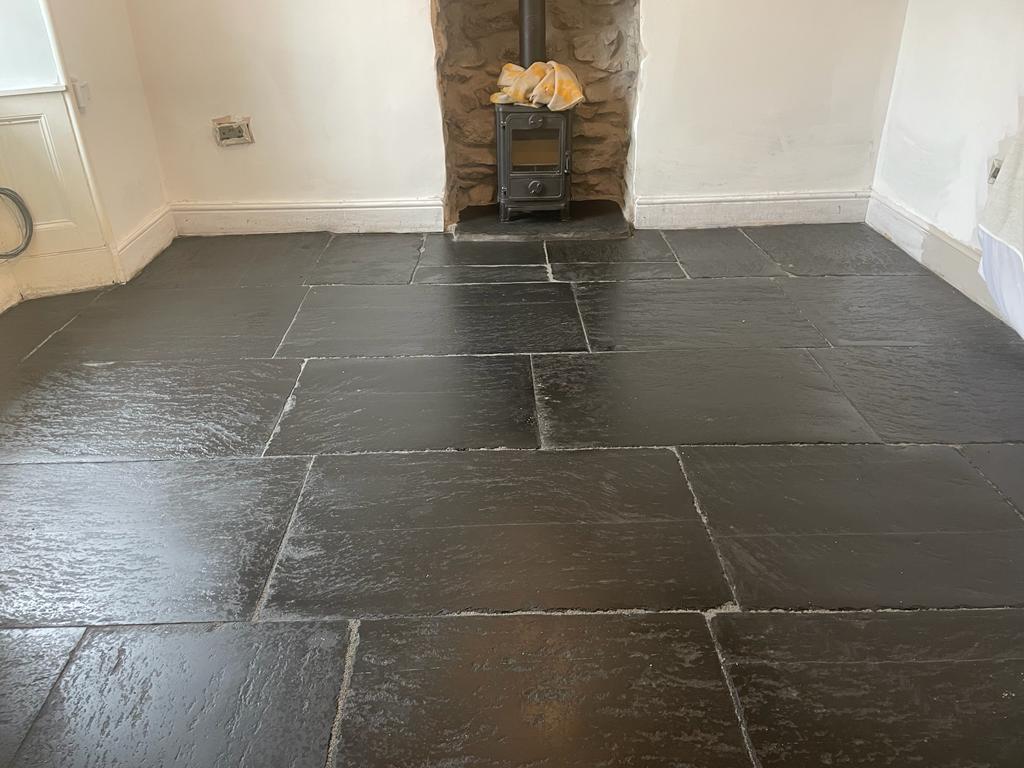
Black Slate Floor After Cleaning Grange-Over-Sands

Once the sealer dried the room was transformed, additionally the newly milled finish will make the stone a lot easier to clean and maintain unlike the rough texture it had before. This was a great result when you consider this is an original slate floor over 200 years old; original features like this are very much sought after so a good investment that’s a natural fit within the older building.

I always mention to my customers the importance of using a PH neutral tile cleaning product for aftercare cleaning and not to use a bleach-based cleaning products which are simply too strong and will prematurely damage the sealer given time reducing its protective qualities and appearance.

Black Slate Floor After Cleaning Grange-Over-Sands


Professional Slate Floor Restoration in South Cumbria

200-Year-Old Black Slate Floor Restoration in Grange over Sands Read More »

Victorian Tiled Floor Renovation Ulverston

1860s Victorian Mansion Flooring Restored in Ulverston

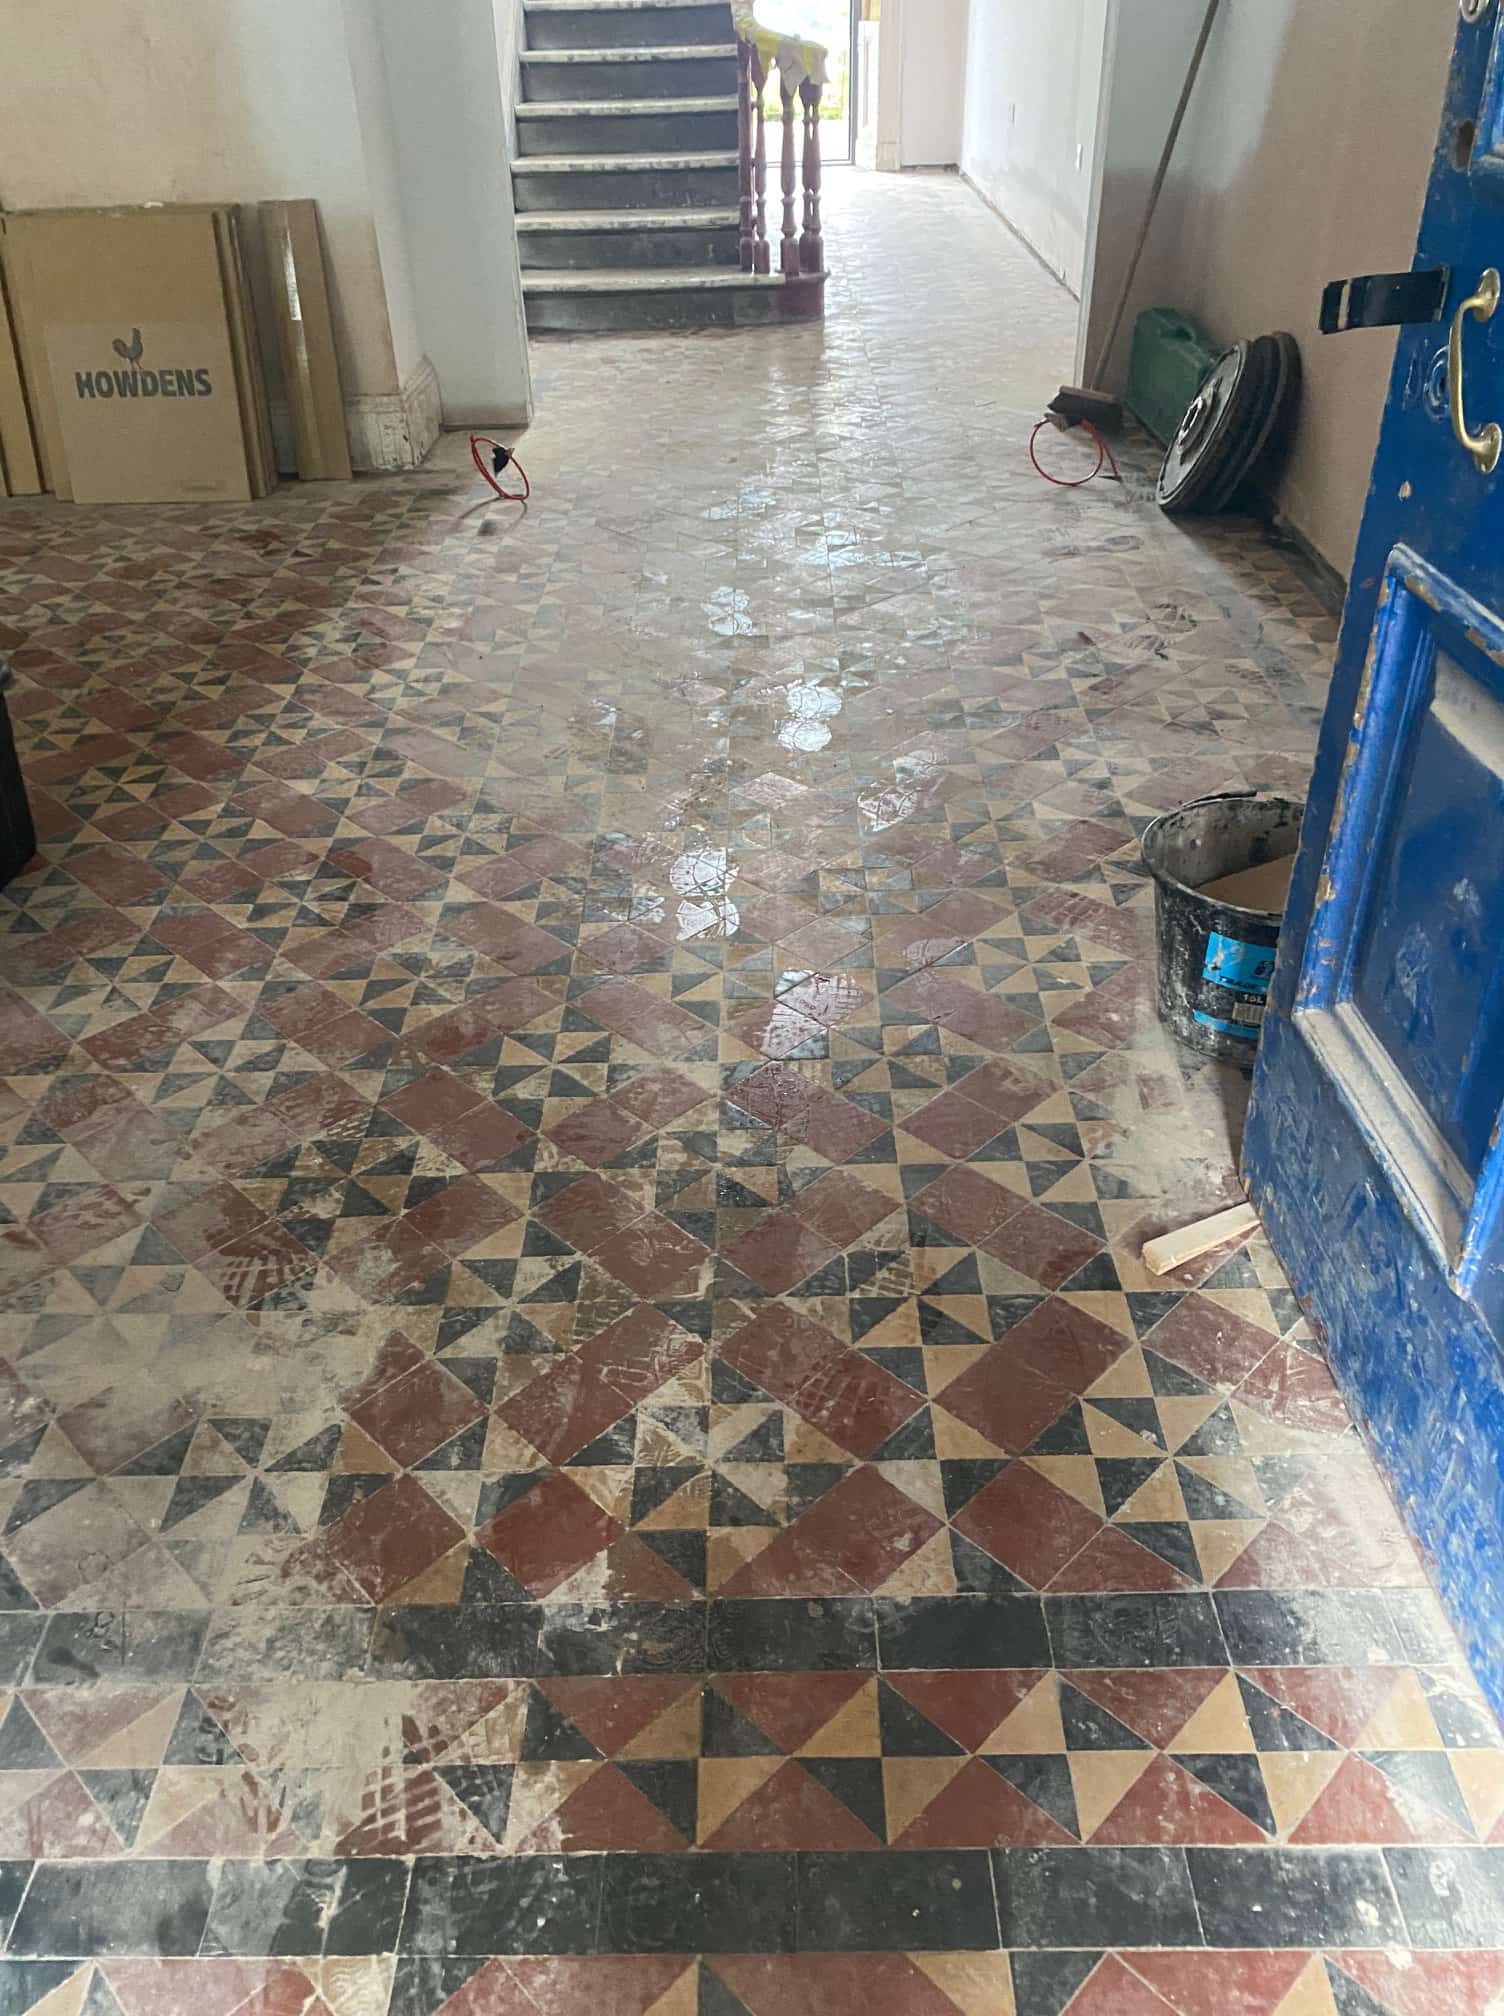
Detailed below is the restoration of several original Victorian tiled floors at an older building in Ulverston. The large property was being fully redeveloped after being vacant and unoccupied for the last fourteen years which left it in a bad state of repair.

Damaged Victorian Floor Before Restoration Ulverston

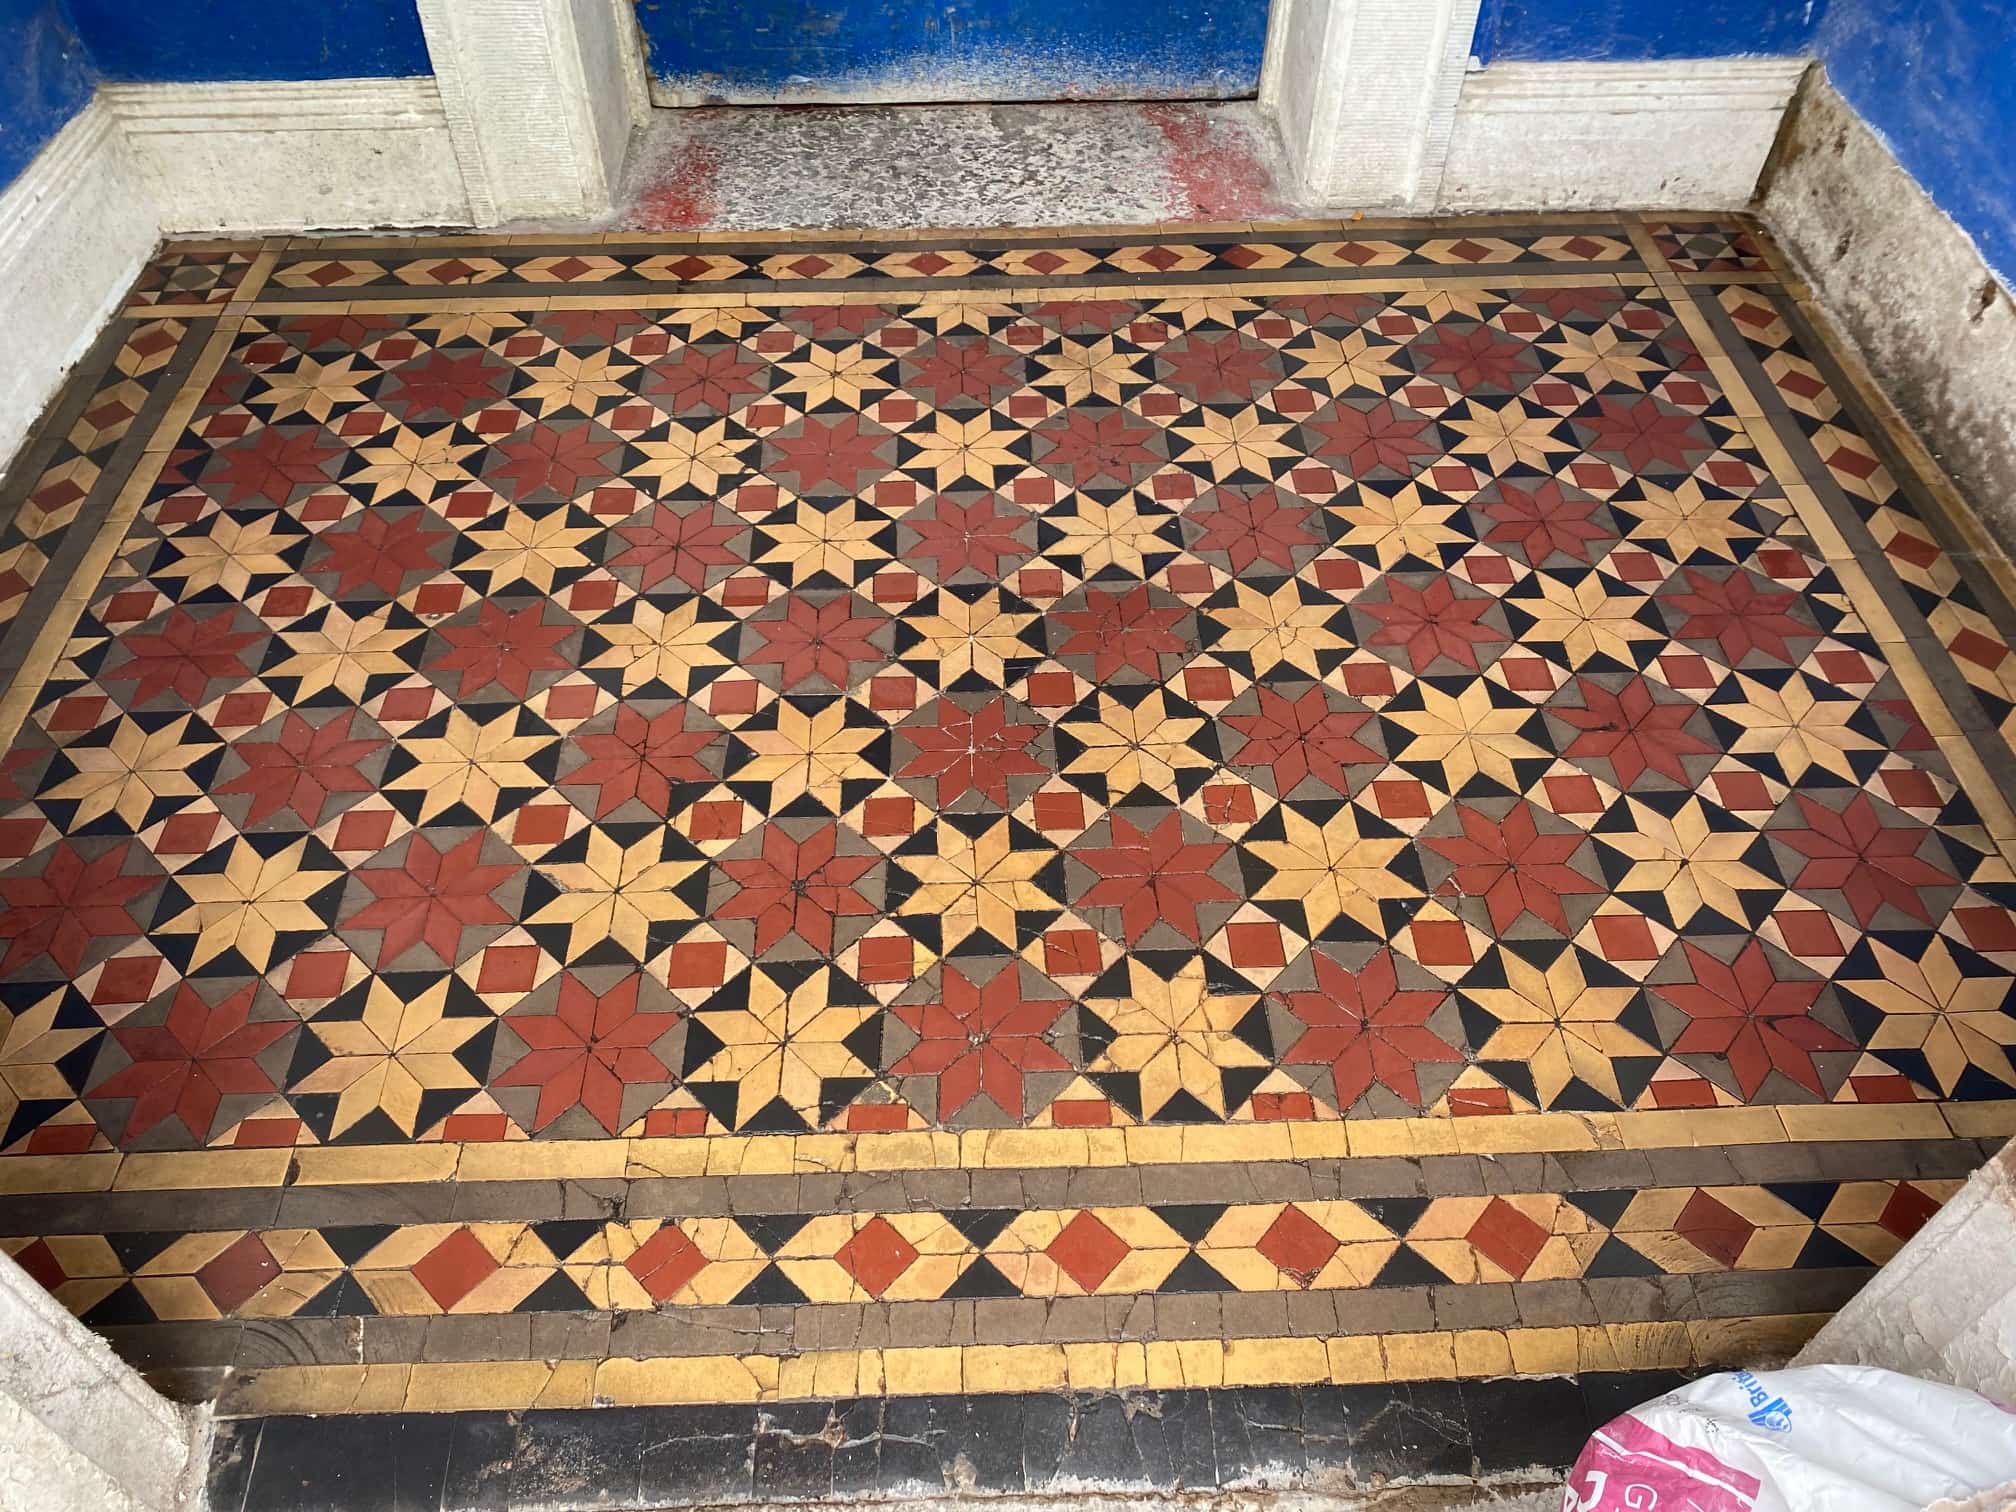
The development company had already spent a significant amount of time and money turning this 1860s Victorian Mansion into 7 modern apartments. Fortunately, they had decided to keep as much of the original features as possible which included the amazing Victorian Floor tiling in the main hallway.

Damaged Victorian Floor Before Restoration Ulverston

Physically the Victorian tiles were in good condition apart from two areas near the doors where some damage had been done to them in the past. The area measured 50m2 approximately so I could see it would need two Tile Doctors over four days to repair the damage and fully restore the tiles.

Damaged Victorian Floor Before Restoration Ulverston

Deep Cleaning a 50m2 Victorian Tiled Hallway

The first day was mainly about deep cleaning the whole area using Tile Doctor Remove and Go worked into the floor using a 200-Grit Diamond pad fitted to a buffing machine. This process releases sediment, dirt and old coatings from the tile which is then extracted using a wet vacuum. It’s worth considering that you can’t really clean these types of tiles properly without a wet vacuum, a mop and bucket simply doesn’t cut it also mopping an area this size simply takes too long.

The next stage of the cleaning process was to give the floor an acid wash using another Tile Doctor product called Grout Clean-up which has an acidic base. This process neutralises the alkaline cleaning product used earlier and microscopically etches the clay tile to achieve a better boned with the sealer which will be applied later. This acid also helps in the cleaning process and will counter any efflorescent salt issues that are common problem with floors of this age. Once removed with the wet vacuum the floor is rinsed and extracted again to ensure any residue is removed and the floor is as dry as possible.

Repairing a Victorian Tiled Hallway

Whilst the main floor was left to dry, we proceeded to work on the damaged and missing tiles. This is one of the advantages of using a Tile Doctor for work like this as you will find other tile cleaning companies won’t offer a Tiling service. I must say thought we only offer tiling as part of a larger “Restorative Cleaning” project which is something we specialise in.

Damaged Victorian Floor Before Restoration Ulverston Damaged Victorian Floor During Restoration Ulverston Damaged Victorian Floor After Restoration Ulverston

Sealing a 50m2 Victorian Tiled Hallway

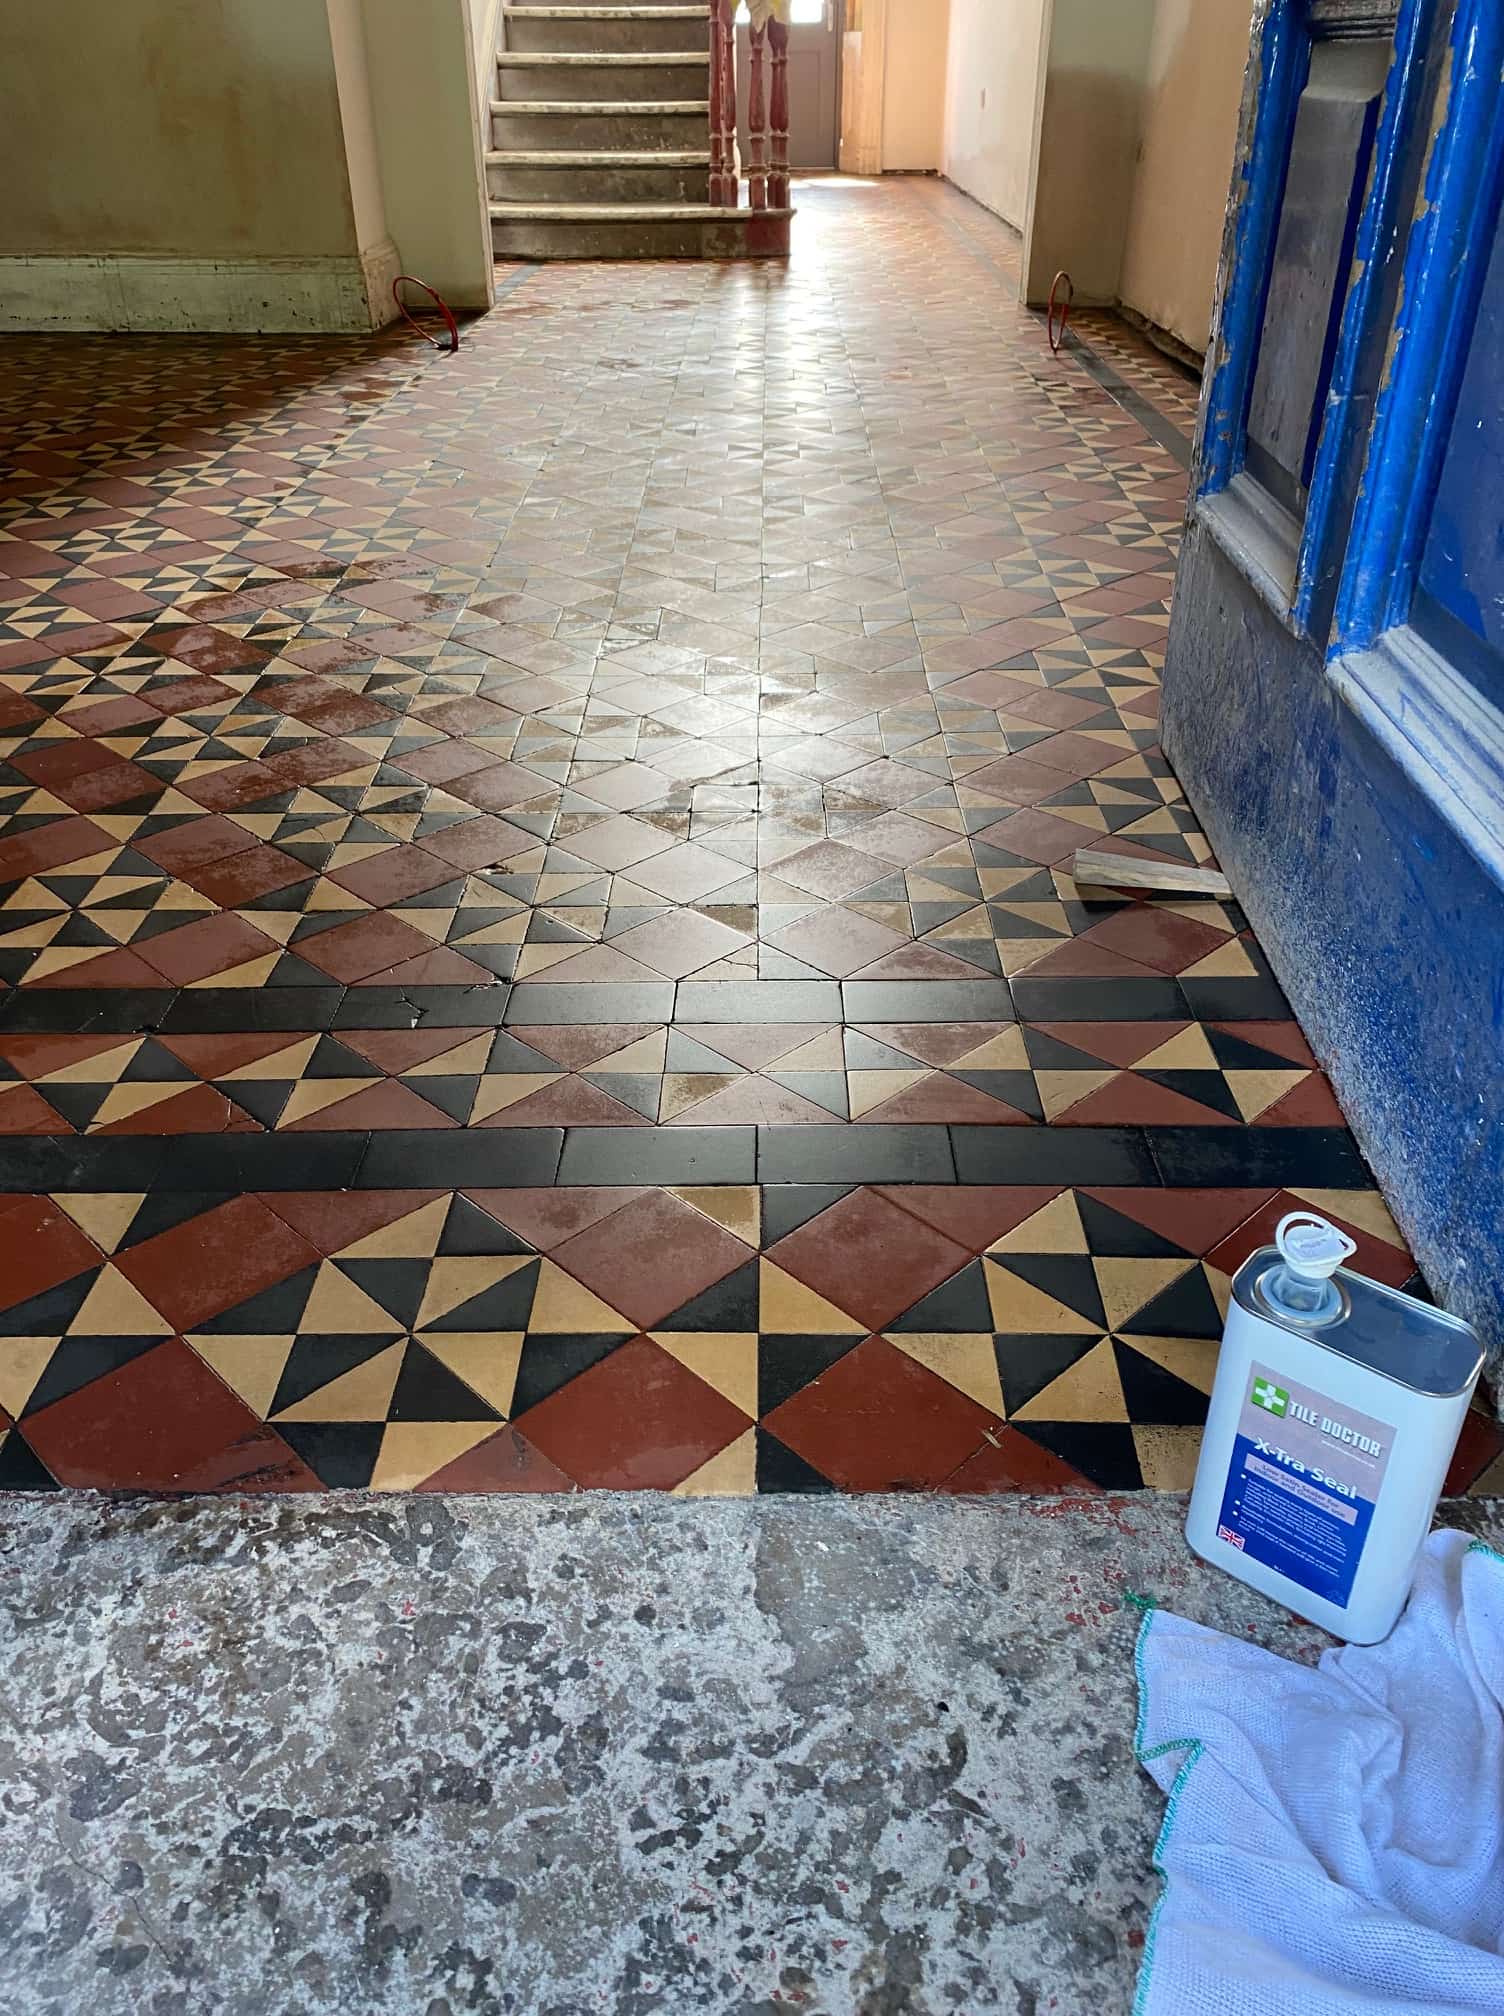
Once the Tiling was completed and the Tiles had dried out (24 hours later) we returned to seal the floor. For this a single coat of Tile Doctor X-Tra seal was applied, this was chosen for its durability and the fact that its fully breathable which is important feature for floors of this age without a damp proof membrane. It’s an oil resin formula which makes it thicker than a solvent-based sealer so in most cases only one coat is required, it can also be used externally.

Damaged Victorian Floor After Restoration Ulverston

It takes several hours for the sealer to fully dry and around 24 hours to fully cure so the photographs I took don’t really do the sealer justice. Unfortunately, I couldn’t wait around that long.

Damaged Victorian Floor After Restoration Ulverston


Professional Restoration of Victorian Mansion Flooring in South Cumbria

1860s Victorian Mansion Flooring Restored in Ulverston Read More »

Scroll to Top